Please note that instances of “Brand” refer to a property collection, we are currently converting the terminology site wide.
Add a property to a collection manually
Properties are added to a collection via the Edit property pages. You can view all properties by using the “Show Properties” admin page which is a subsection of the “Rentals” tab on the left hand menu. If you have hundreds/thousands of properties on your account, you may need to filter your search to only show properties imported via a specific owner, or supplier.
Go to the relevant property and on the right hand side of the main tab there should be a “Brand” section, here you can view the property collections.
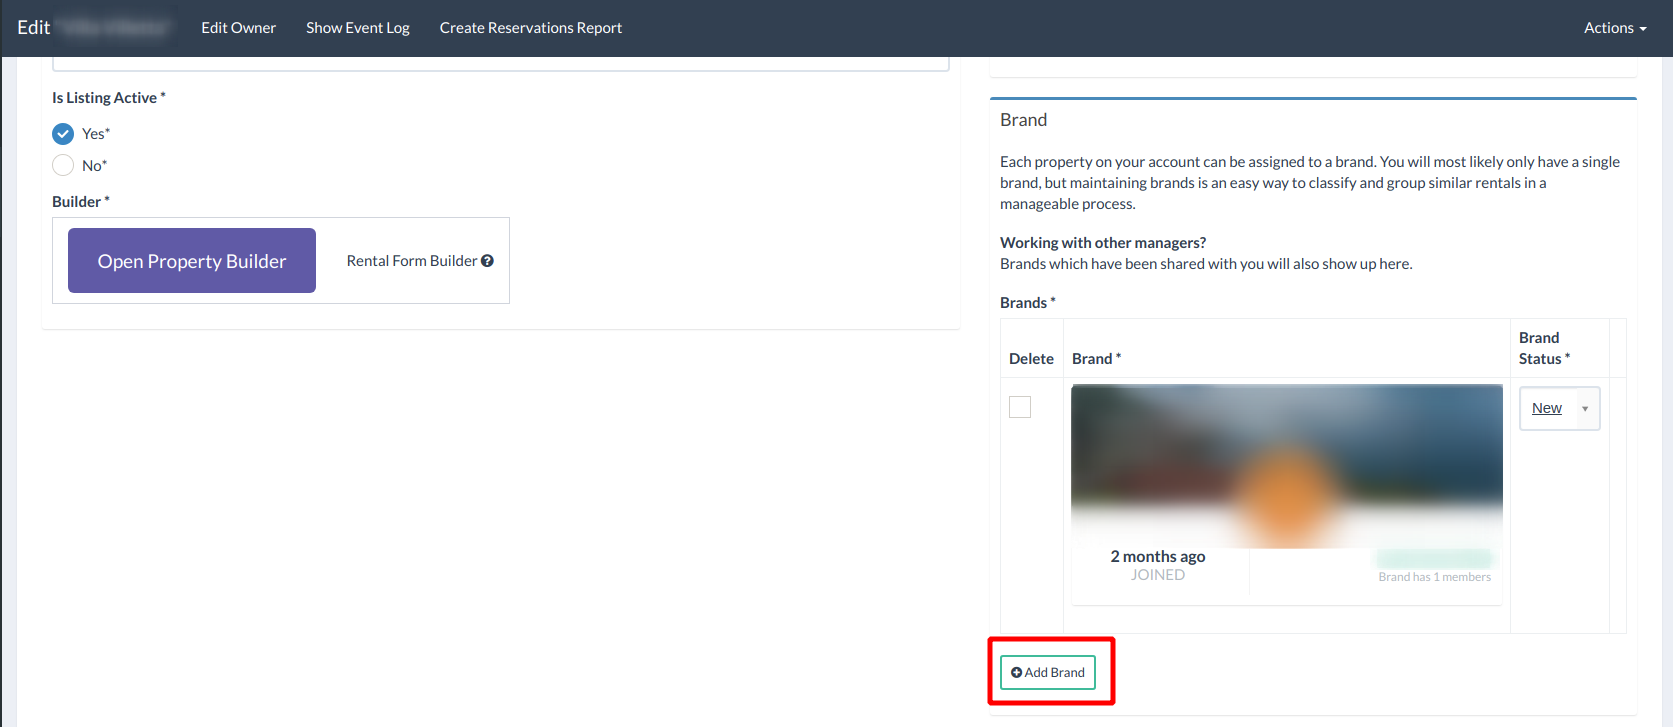
From here you can also add the property to a collection via “Add Brand”, don’t forget to click “Update” at the bottom.
Adding properties automatically
This setting is configured from Integrations, find your relevant integration and go to its edit page.
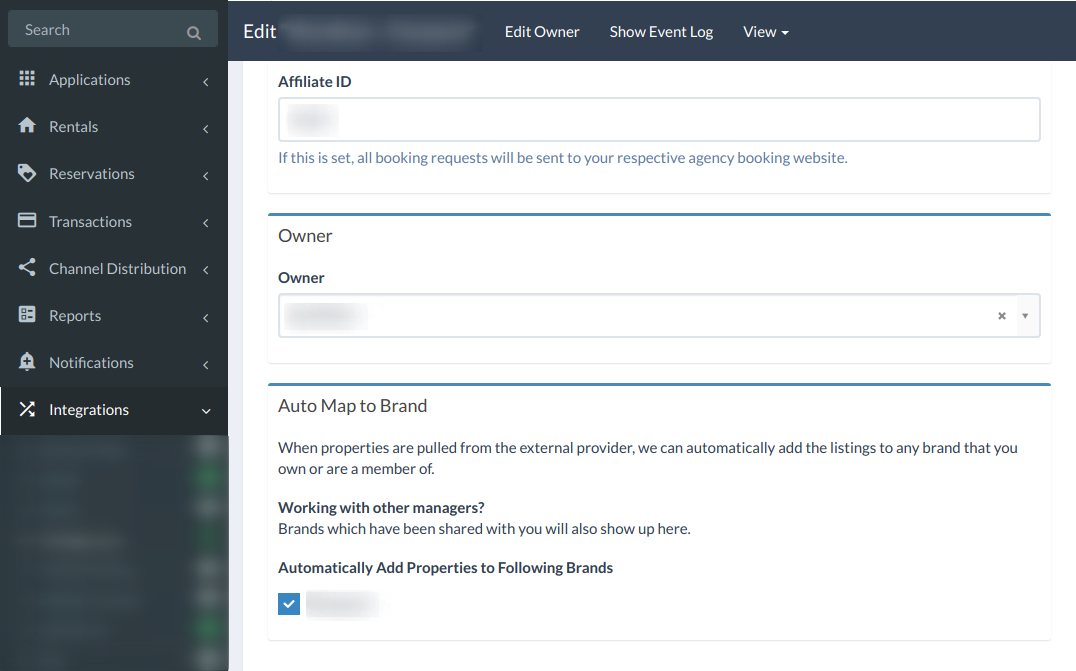
Check the relevant property collection on the “Auto Map to Brand” and click Update.
Identifying which properties are in a collection
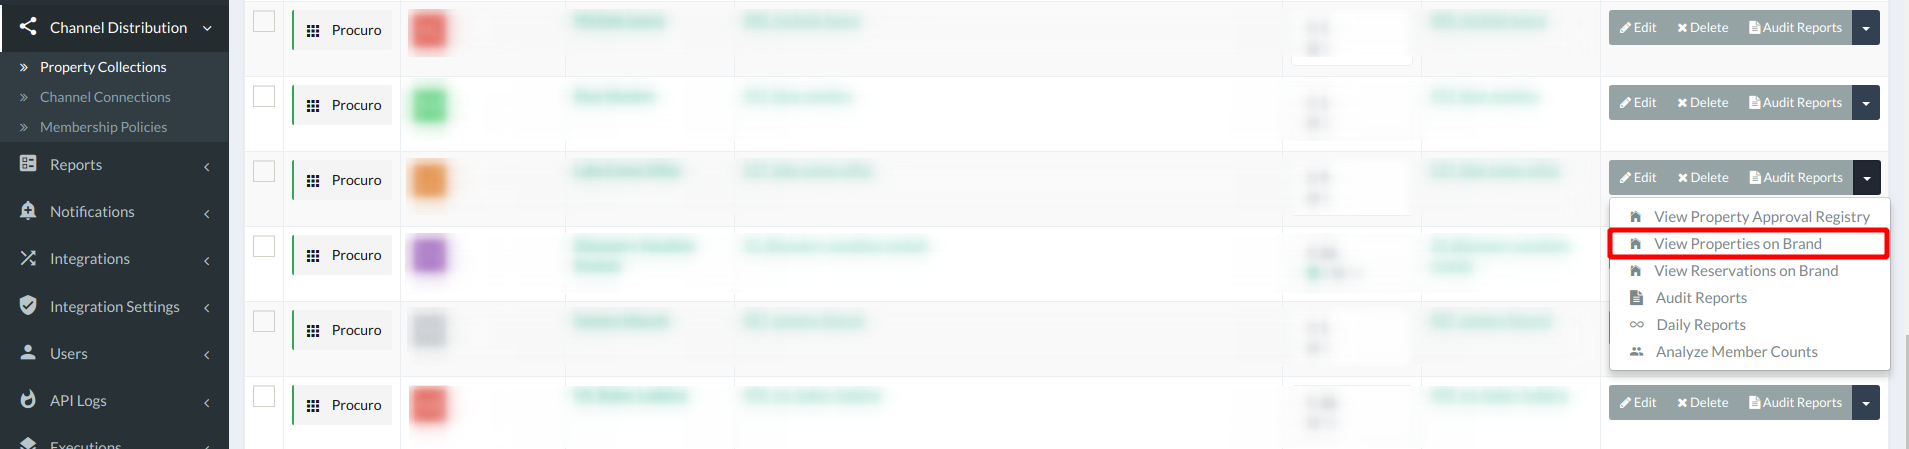
On the left menu go to Channel Distribution -> Property Collections, find the collection you wish to view the properties on and locate the dropdown on the actions menu.
Please note that old properties won’t instantly be added to the collection, it will happen on next pull